Step 1
ASK: Would you like to receive a text when your prescription is ready?
Step 2
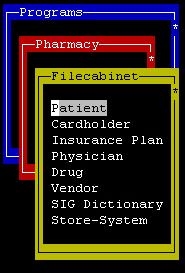
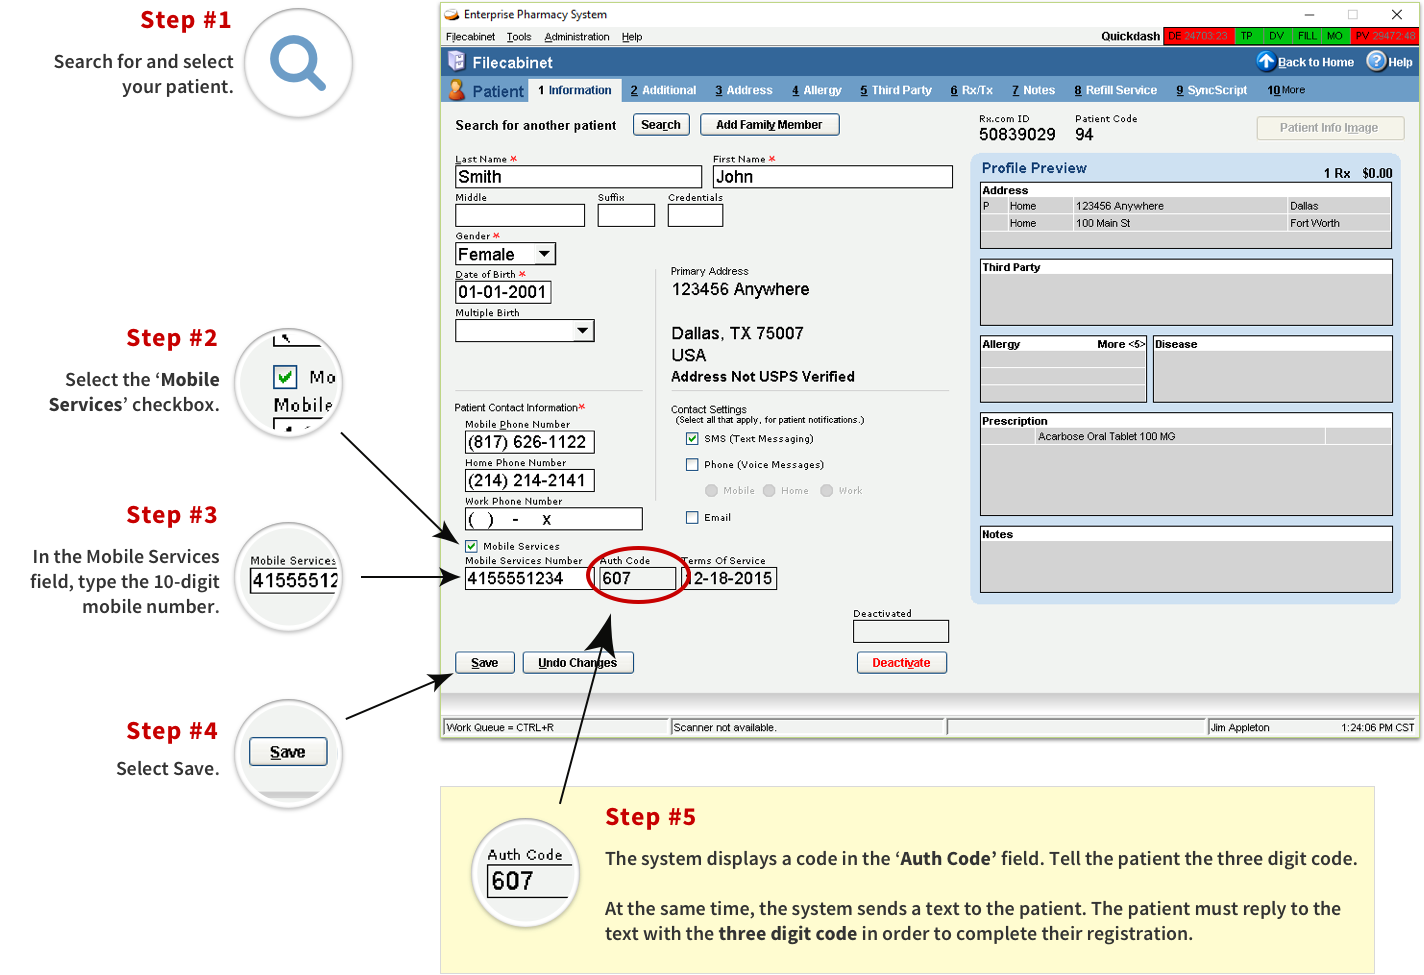
Navigate to Patient File > Select Patient.
Step 3
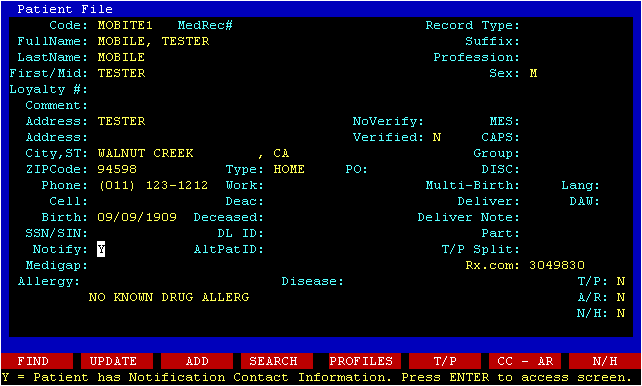
Tab Down to “NOTIFY" and mark as "Y" (press Enter).
Step 4
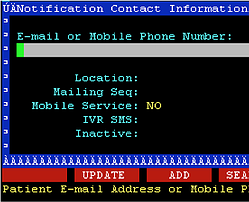
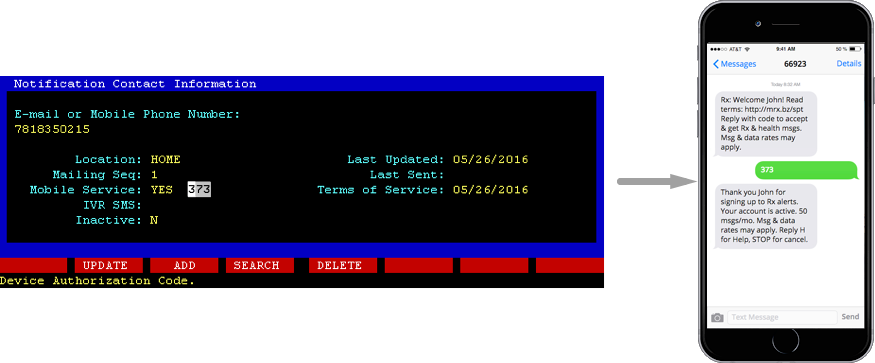
Enter Mobile Number, mark Location as “HOME” and mark Mobile Service as “YES”. Click on “ADD” [F3].
Step 5
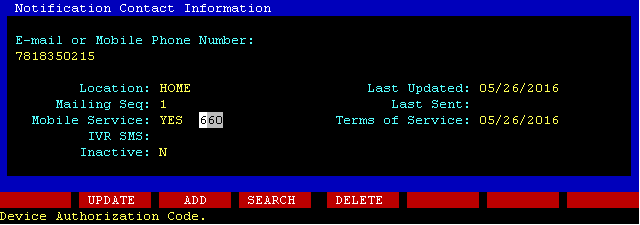
Once mobile number is added, a 3-digit code is generated and displayed next to the Mobile Service field.
Provide this 3-digit code to patient. From here, patient receives a text message.
Patient must respond to the text with the 3-digit code provided.
PDX Classic printable directions
Scroll down for text enrollment instructions for PDX EPS.
PDX EPS printable directions
Step 1
ASK: Would you like to receive a text when your prescription is ready?
Step 2
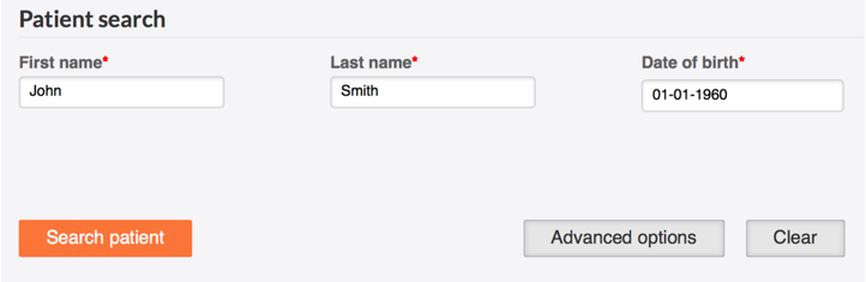
Go to the McKesson patient portal to access the mscripts patient registration page. Enter the patient's First Name, Last Name and Date of Birth and press Enter or click Search Patient.
Step 3
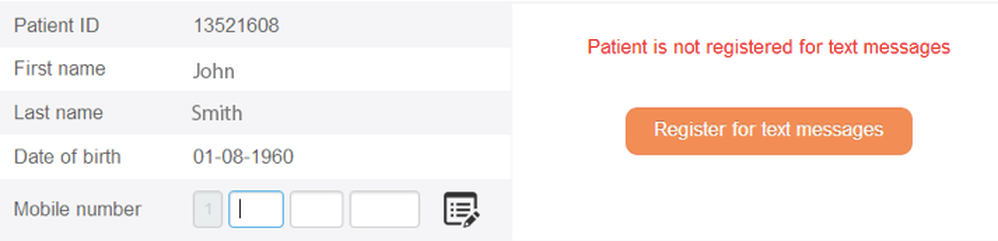
Enter the patient's Mobile Phone Number. Review the terms of service and click the orange icon to turn it into a checkbox. Then press enter or click Register for Text messages.
Step 4
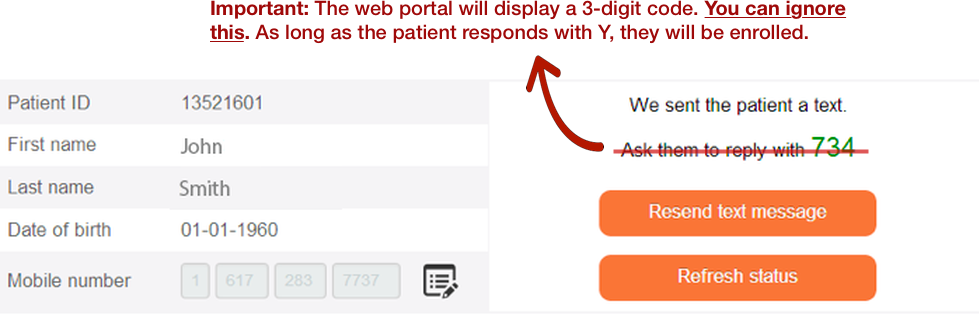
The patient will be sent a text message asking them for a three-digit code. The code will now be displayed on your screen. Please give it to them. Write it down so they don't forget!
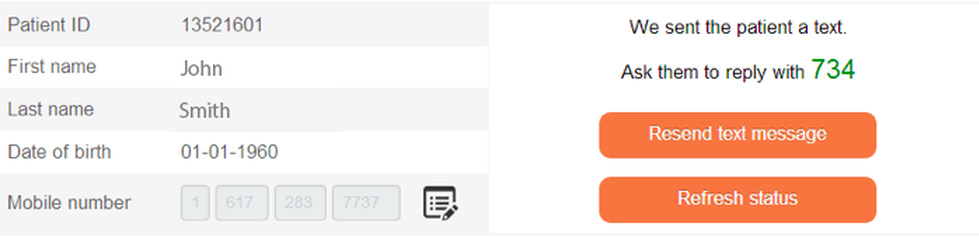
Step 5
Once the patient has responded with their code, you can press refresh status to confirm they are registered.
Step 1
ASK: Would you like to receive a text when your prescription is ready?
Step 2
Navigate to Patient File > Select Patient.
Step 3
Tab Down to “NOTIFY" and mark as "Y" (press Enter).
Step 4
Enter Mobile Number, mark Location as “HOME” and mark Mobile Service as “YES”. Click on “ADD” [F3].
Step 5
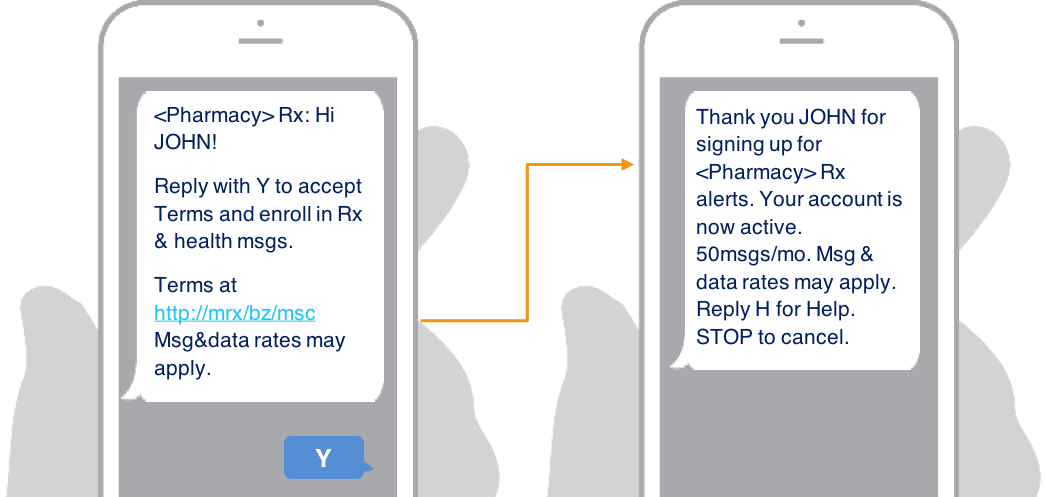
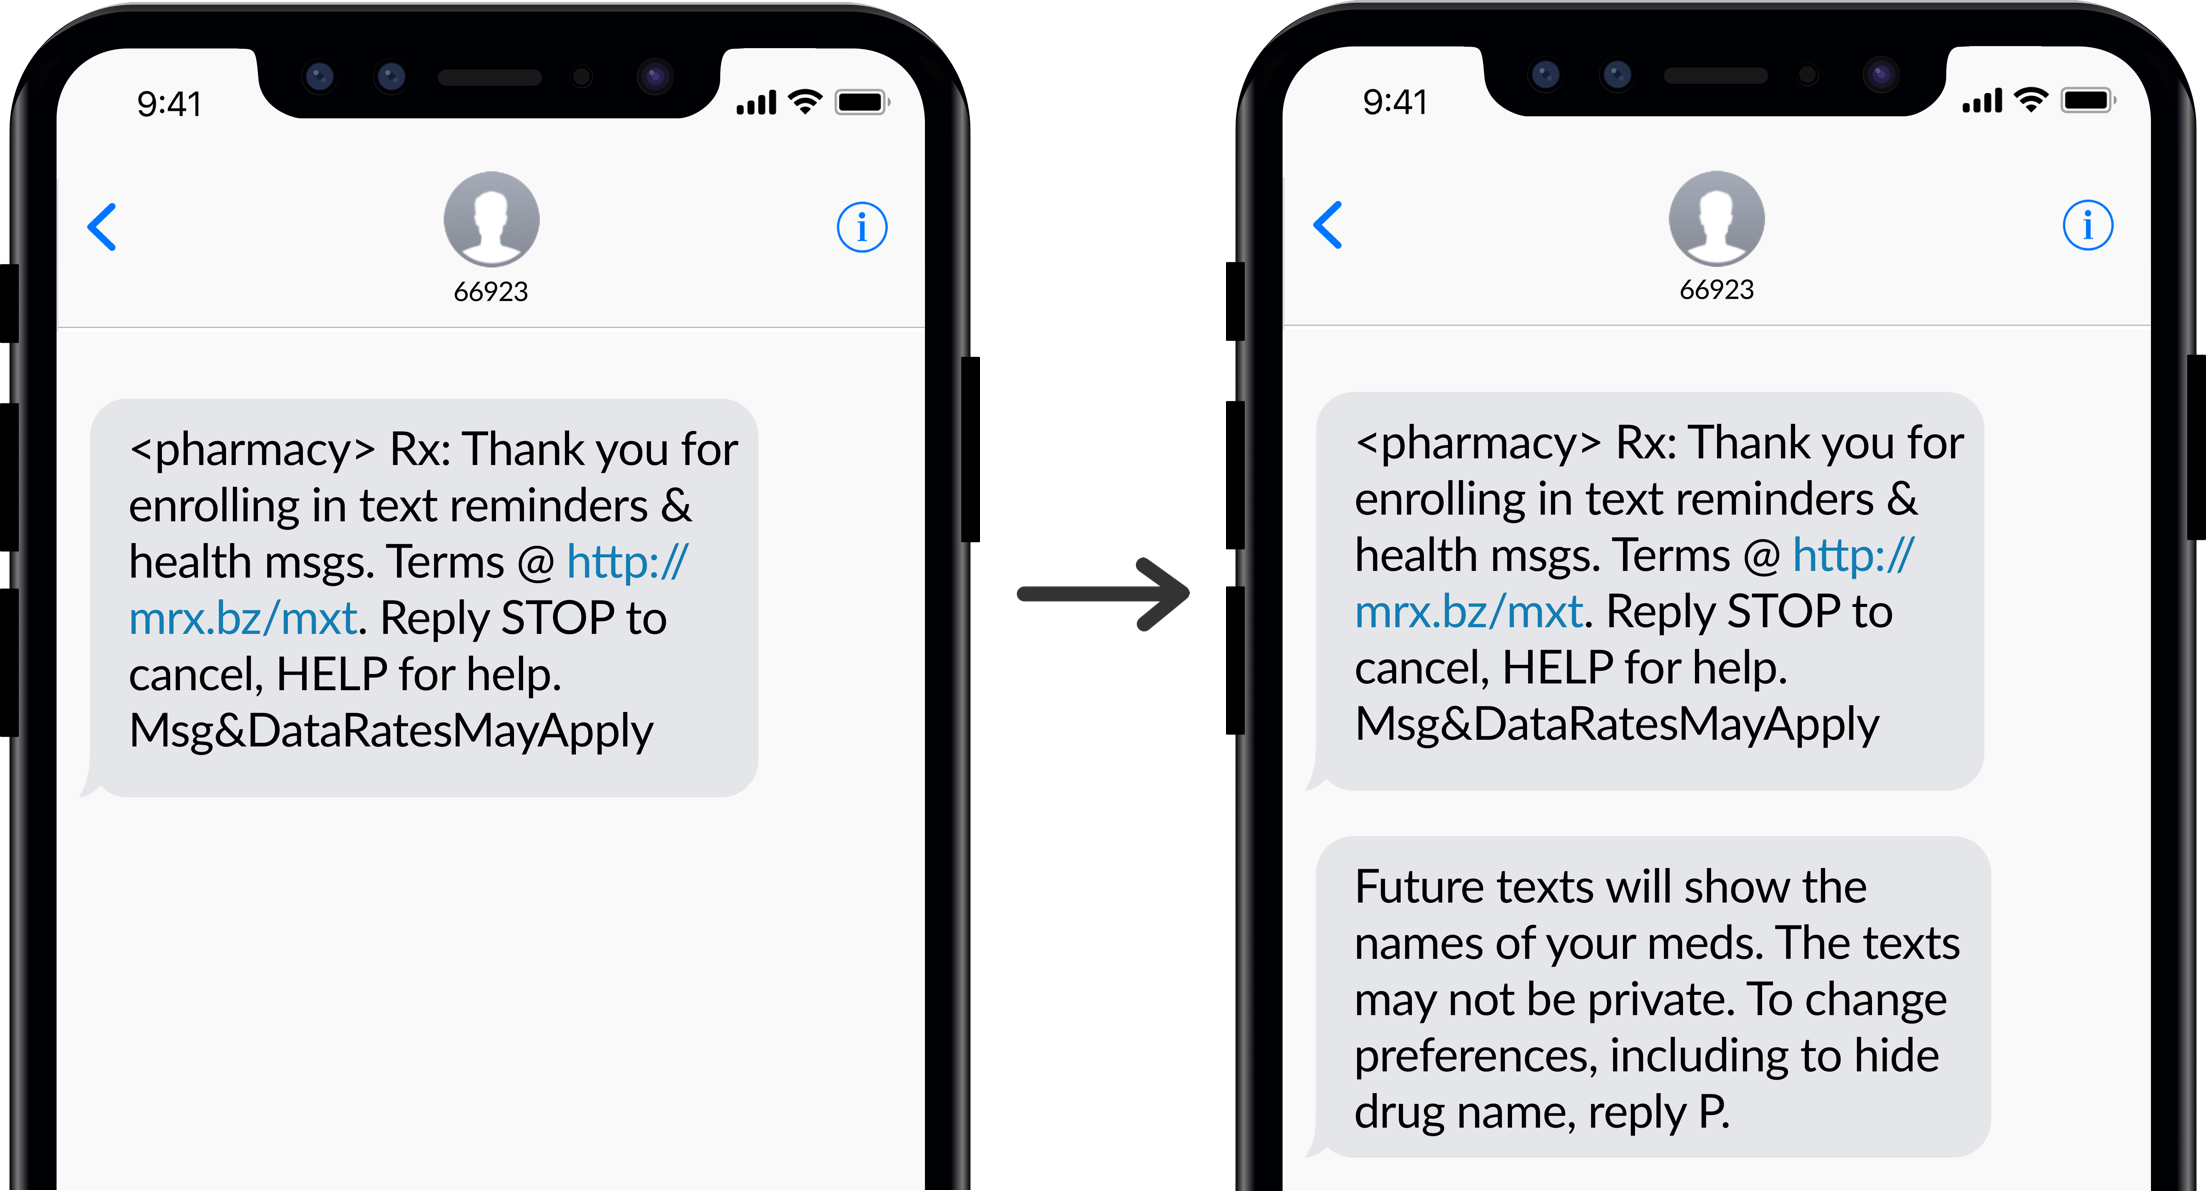
Once Mobile Number is added, patient will receive a welcome message. Tell the patient to reply with Y to the welcome message.
*The PDX system will display a 3-digit code. You can ignore this. As long as the patient responds with Y, they will be enrolled.
PDX Classic printable directions
Scroll down for text enrollment instructions for PDX EPS.
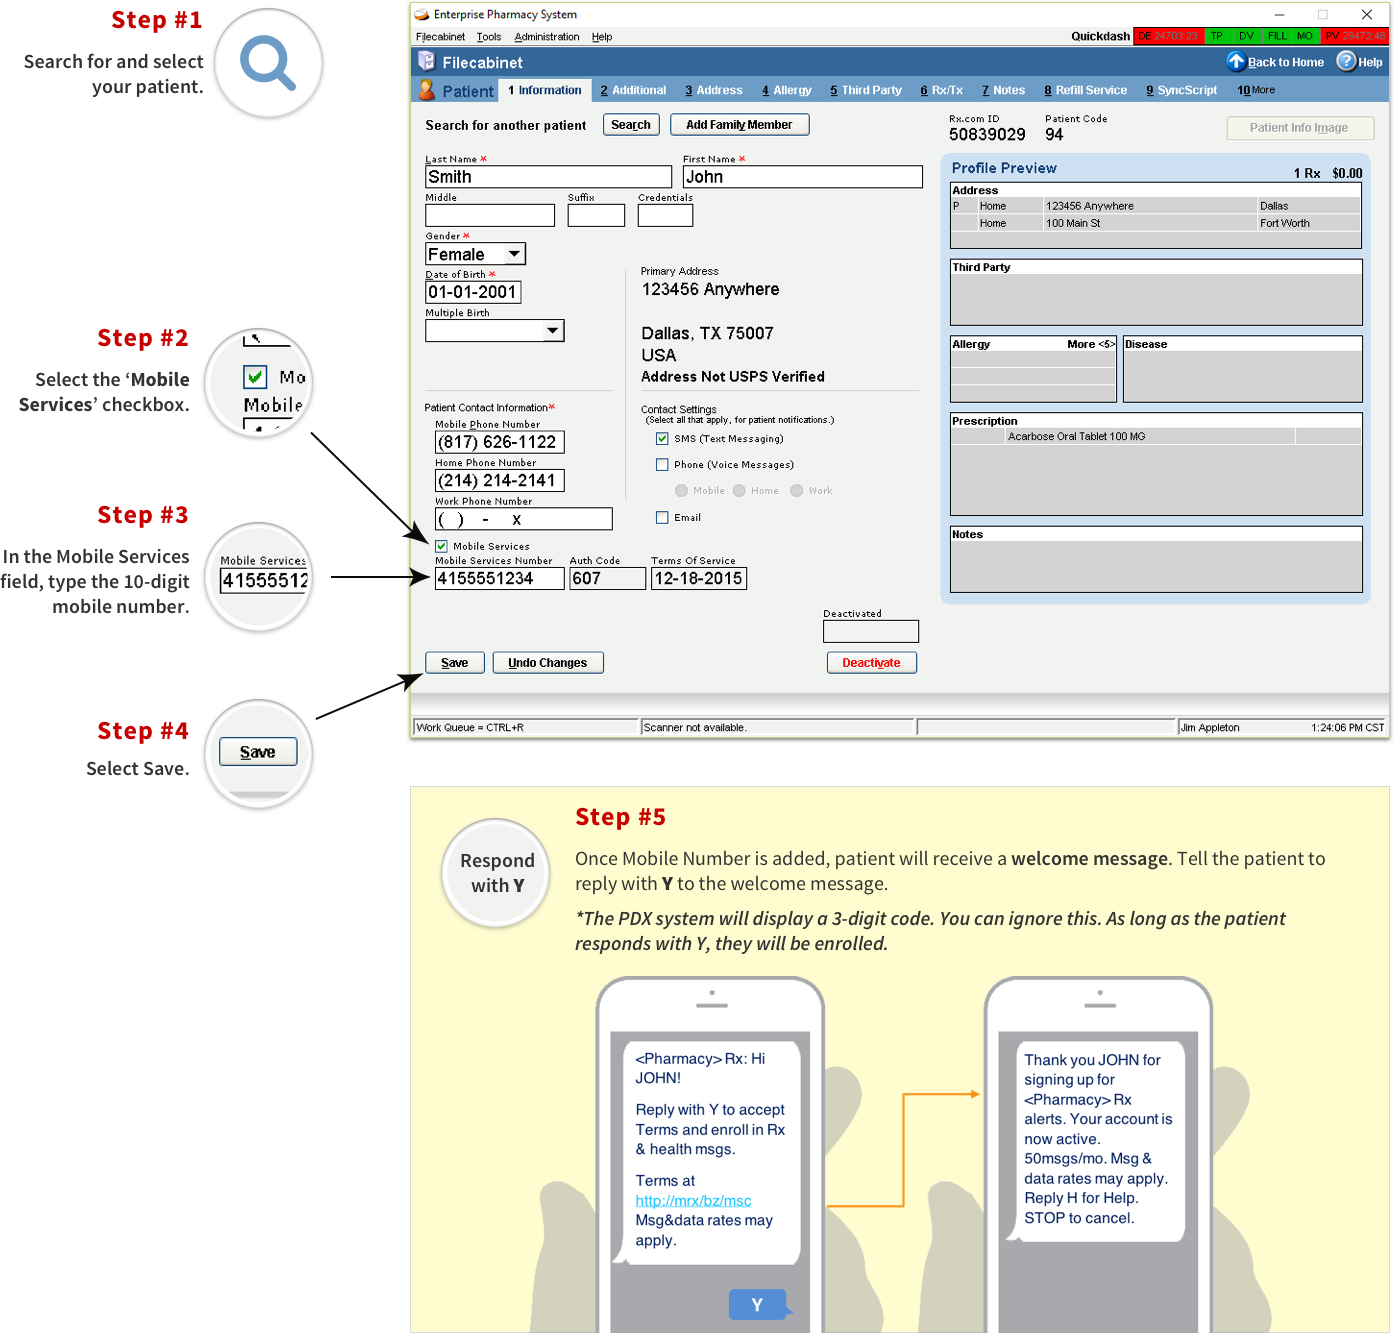
Step 1
ASK: Would you like to receive a text when your prescription is ready?
Step 2
Navigate to Patient File > Select Patient.
Step 3
Tab Down to “NOTIFY" and mark as "Y" (press Enter).
Step 4
Enter Mobile Number, mark Location as “HOME” and mark Mobile Service as “YES”. Click on “ADD” [F3].
Step 5
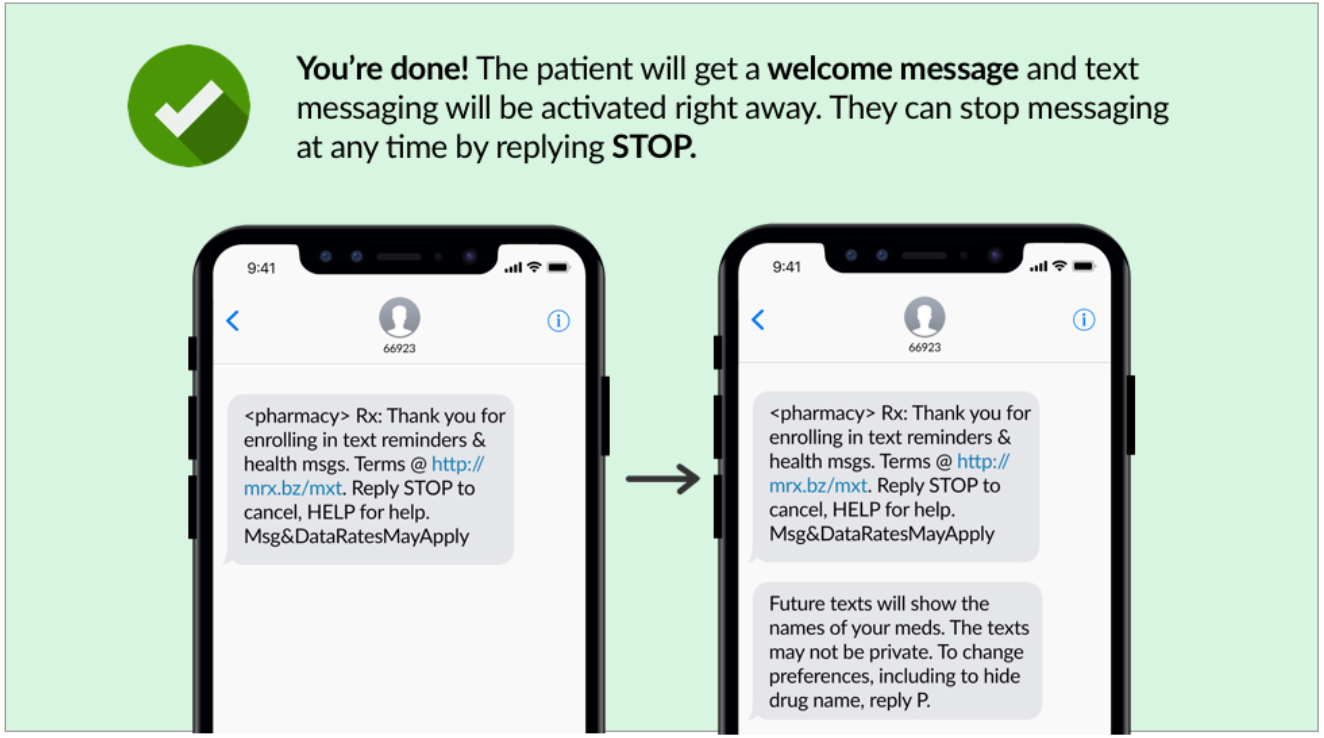
You’re done! Your patient will receive a welcome message and text messaging will be activated right away. They can stop messaging at any time by replying STOP.
*The PDX system will display a 3-digit code. You can ignore this. If patients receive the welcome text message, they will be enrolled.
PDX Classic printable directions
Scroll down for text enrollment instructions for PDX EPS.
PDX EPS printable directions
PDX EPS printable directions
PDX EPS printable directions
Step 1
ASK: Would you like to receive a text when your prescription is ready?
Step 2
Go to the McKesson patient portal to access the mscripts patient registration page. Enter the patient's First Name, Last Name and Date of Birth and press Enter or click Search Patient.
Step 3
Enter the patient's Mobile Phone Number. Review the terms of service and click the orange icon to turn it into a check box. Then press enter or click Register for Text messages.
Step 4
Once Mobile Number is added, click on the 'Register for text messages' button. The patient will receive a welcome message. Tell the patient to reply with Y to the welcome message.
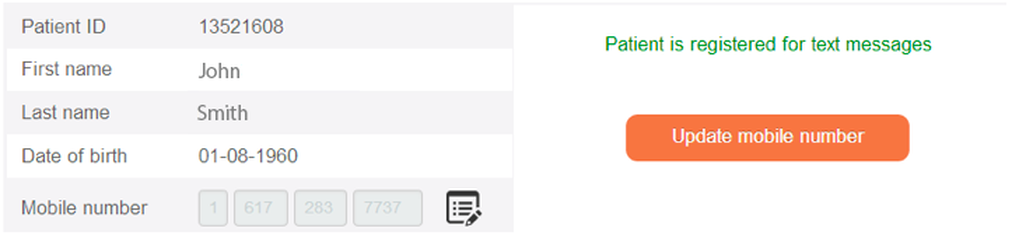
Once the patient has responded with either Y or their code, you can press refresh status to confirm they are registered.
Printable McKesson enrollment directions
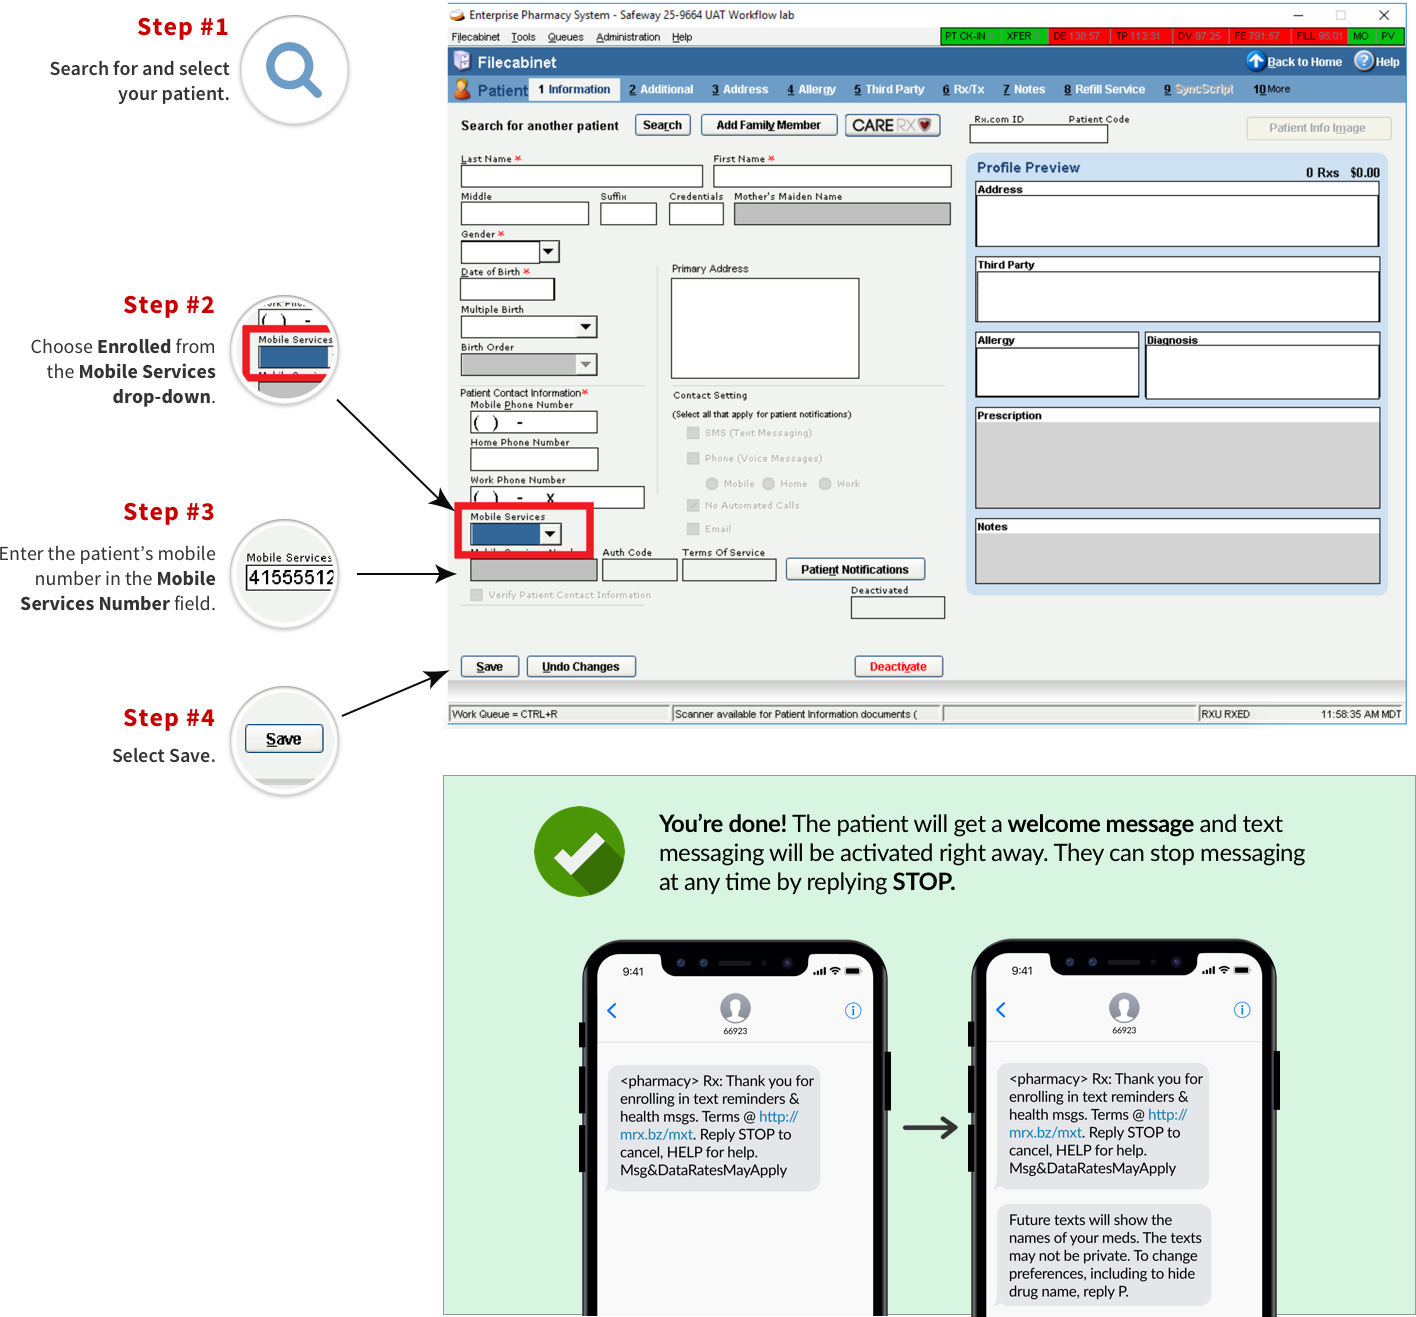
ASK: Would you like to receive a text when your prescription is ready?
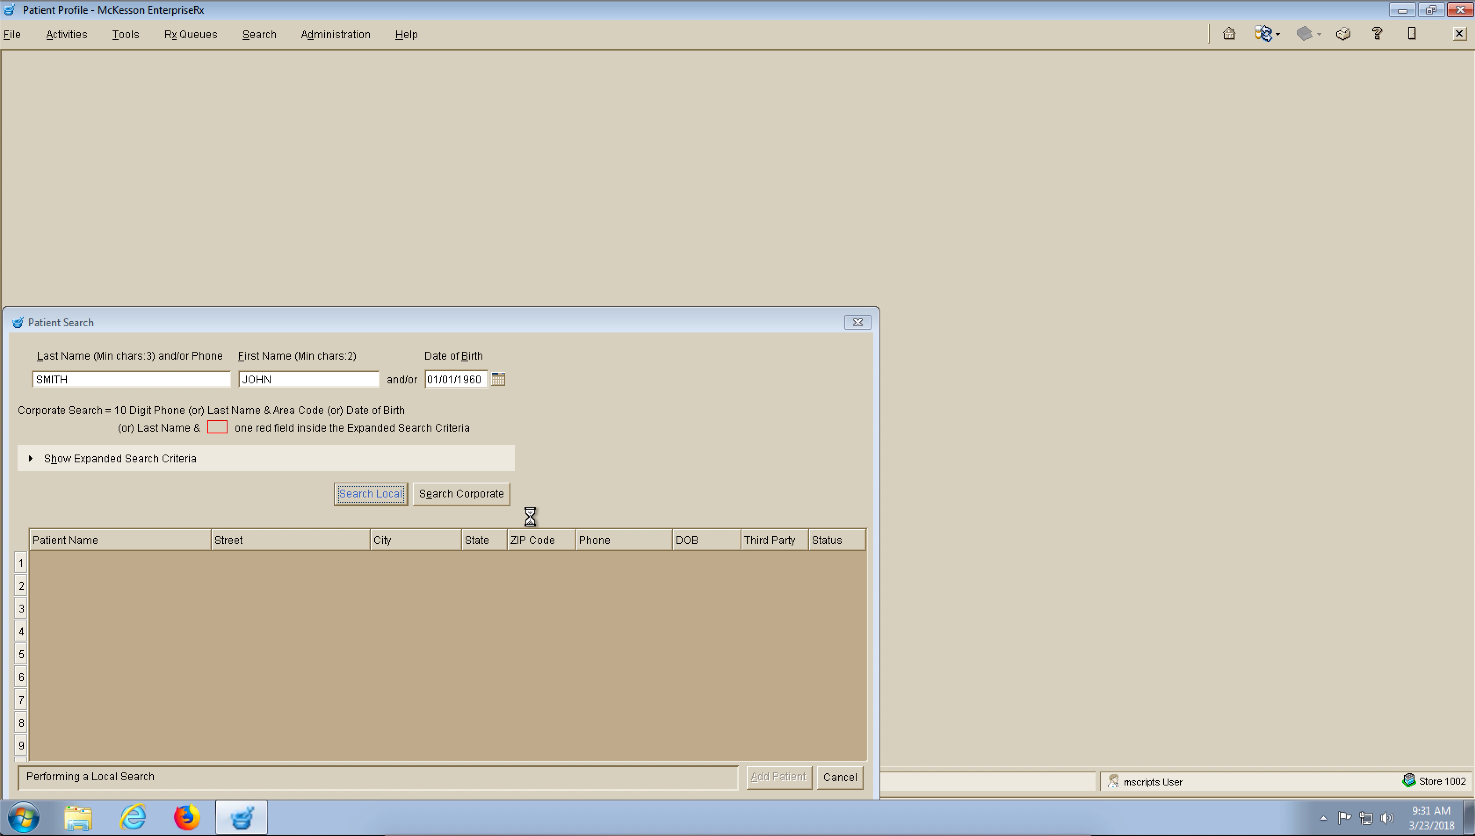
Go to Patient Search in the McKesson EnterpriseRx application and search for the patient.
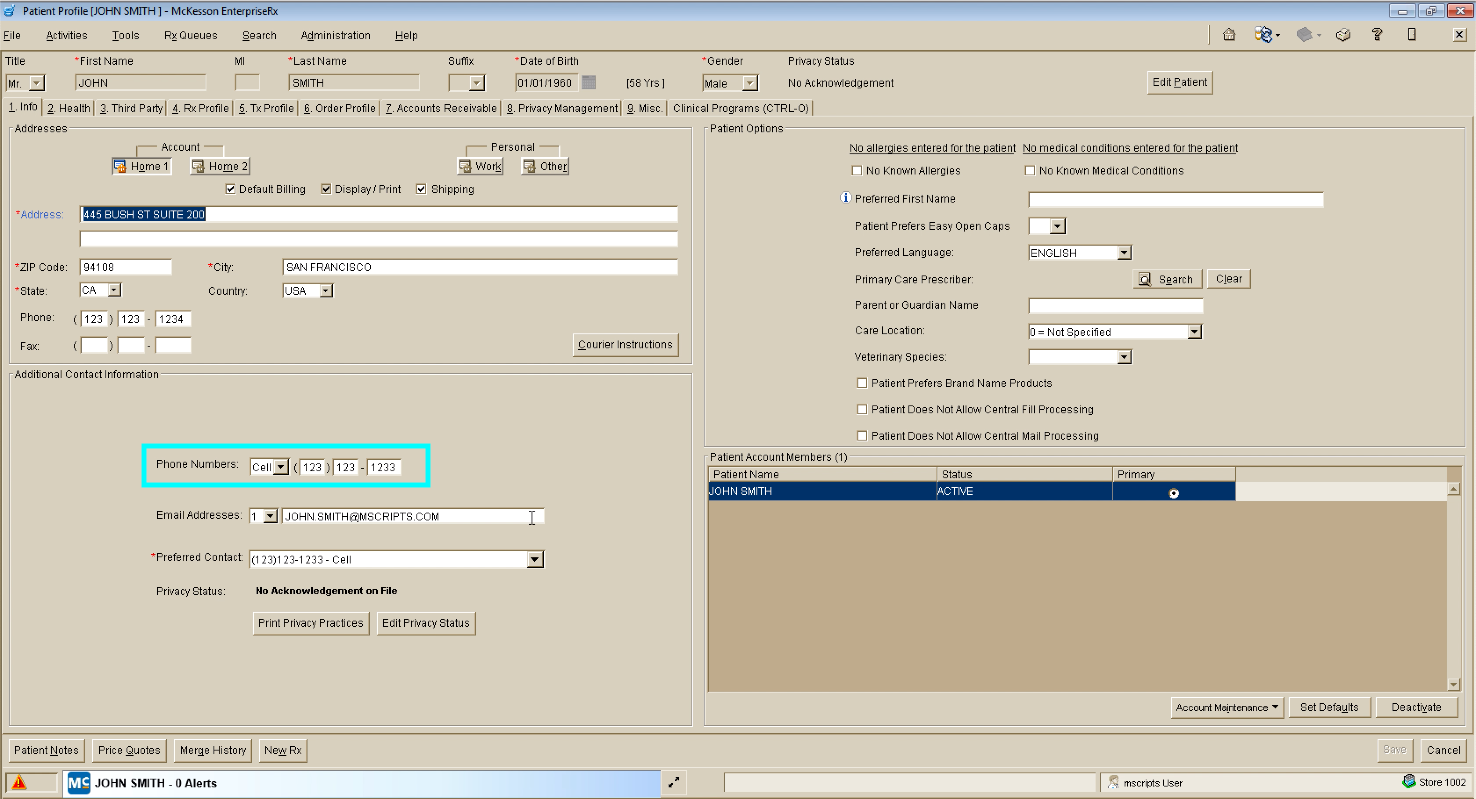
In the Additional Contact Information section, Select Cell in the Phone Numbers drop down and enter patient's mobile number to be used for text message.
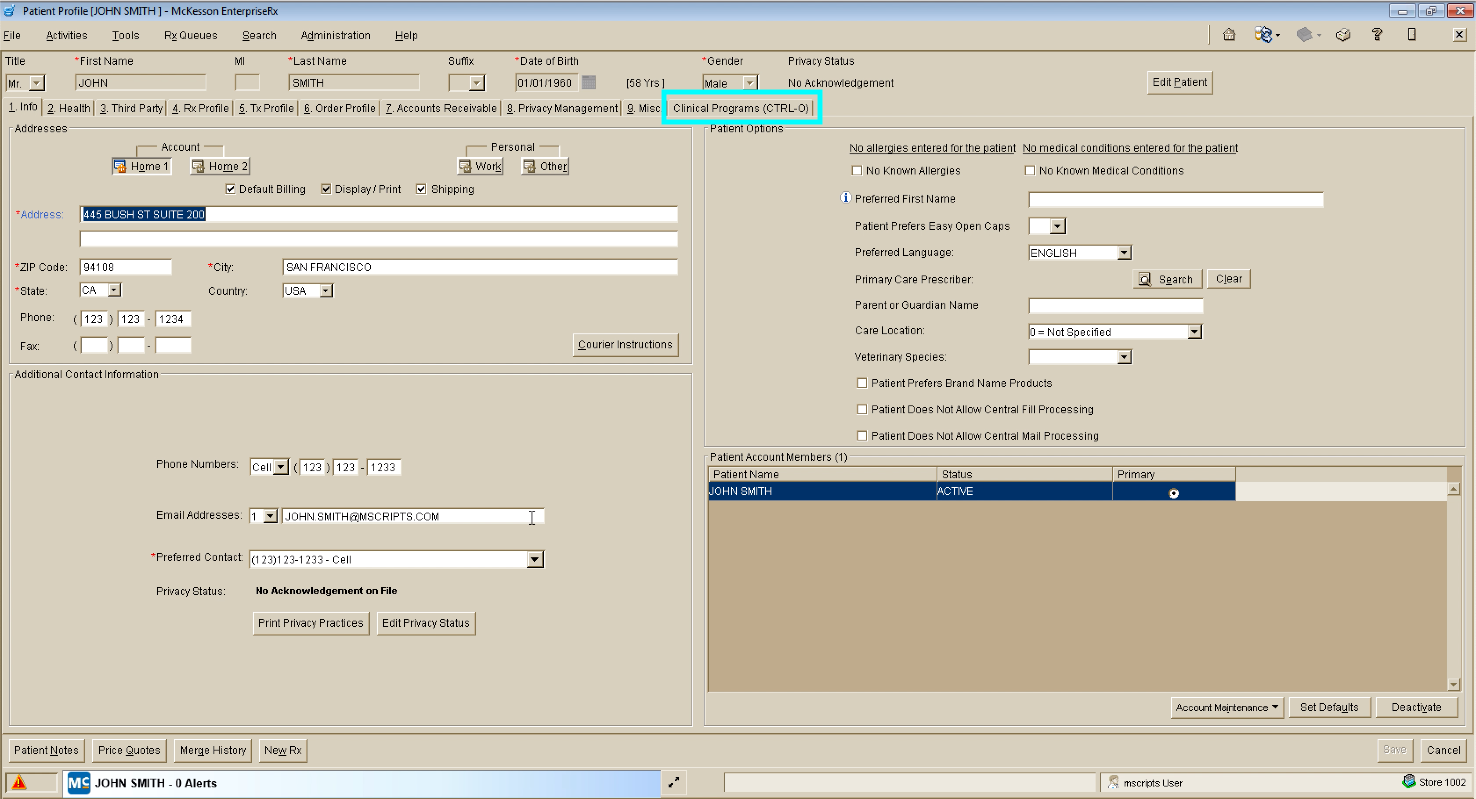
Navigate to the Clinical Programs tab.
Go to the Program Enrollment tab.
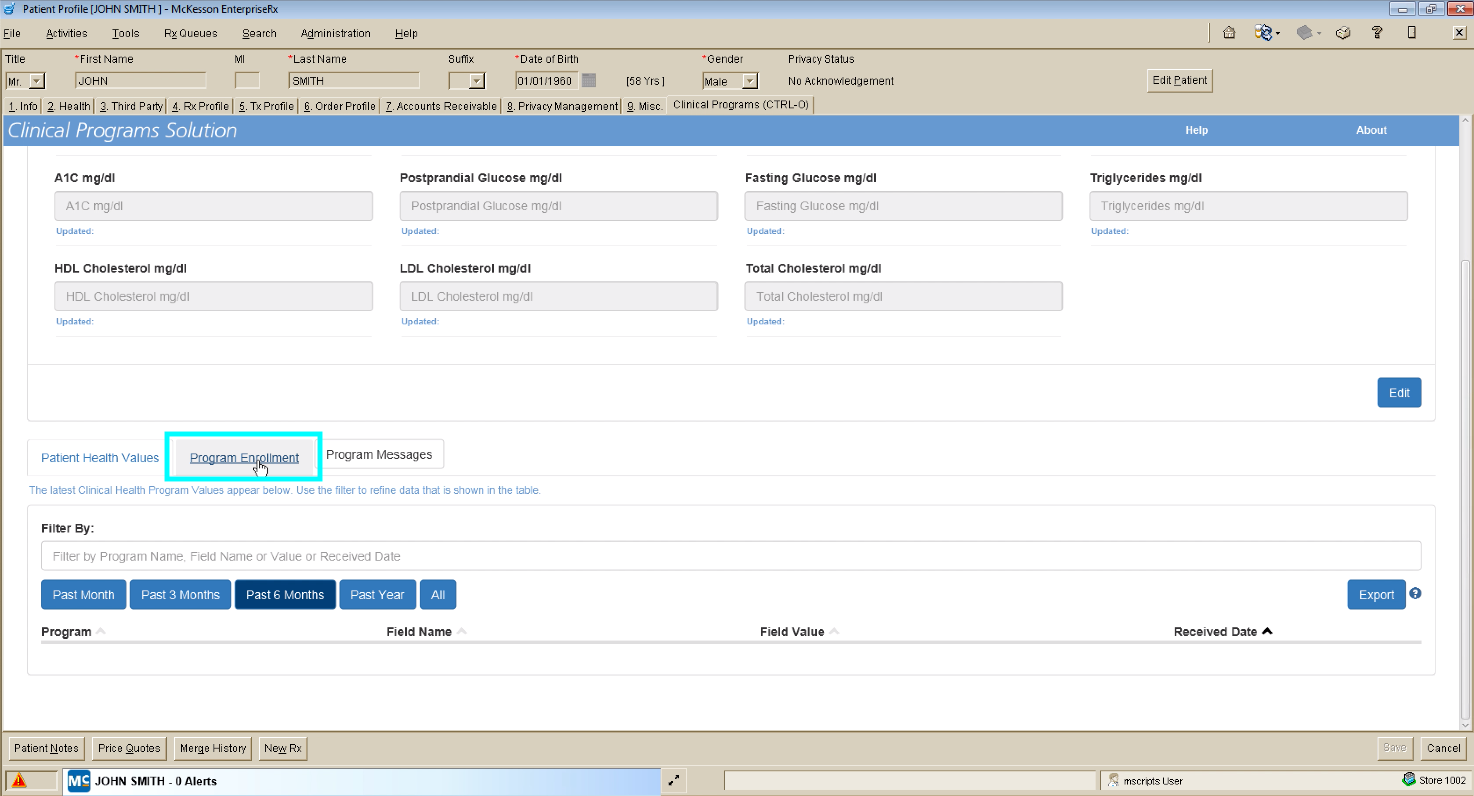
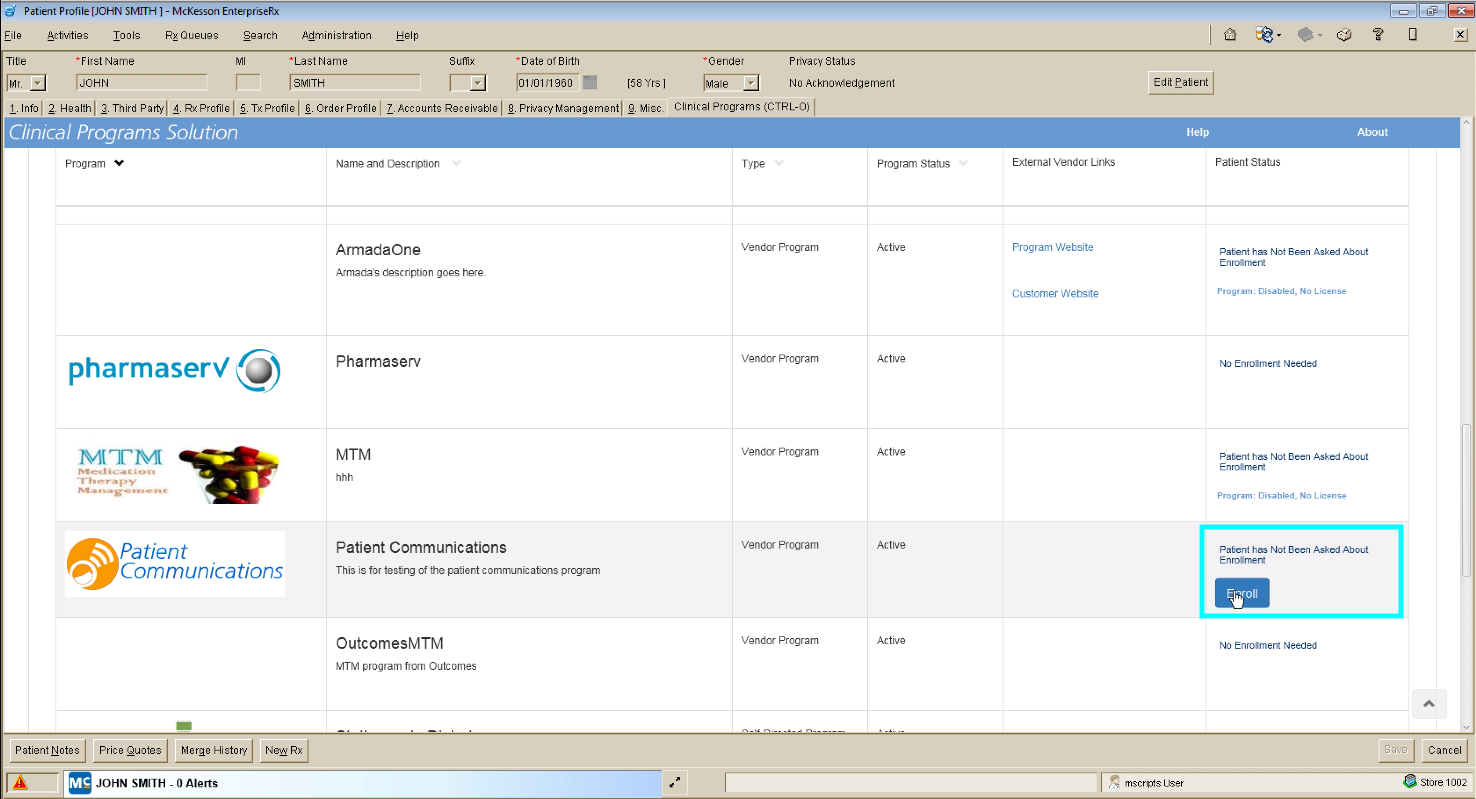
Scroll down to Patient Communications program (PCS) and click on the Enroll button.
Note: After enrollment, the Enroll button will get replaces by Configure and Unenroll buttons. For mobile number changes, the Configure button should be clicked.
Go to Program Values -> Communication Preferences -> Text Message and select patient's cell number from the drop down.
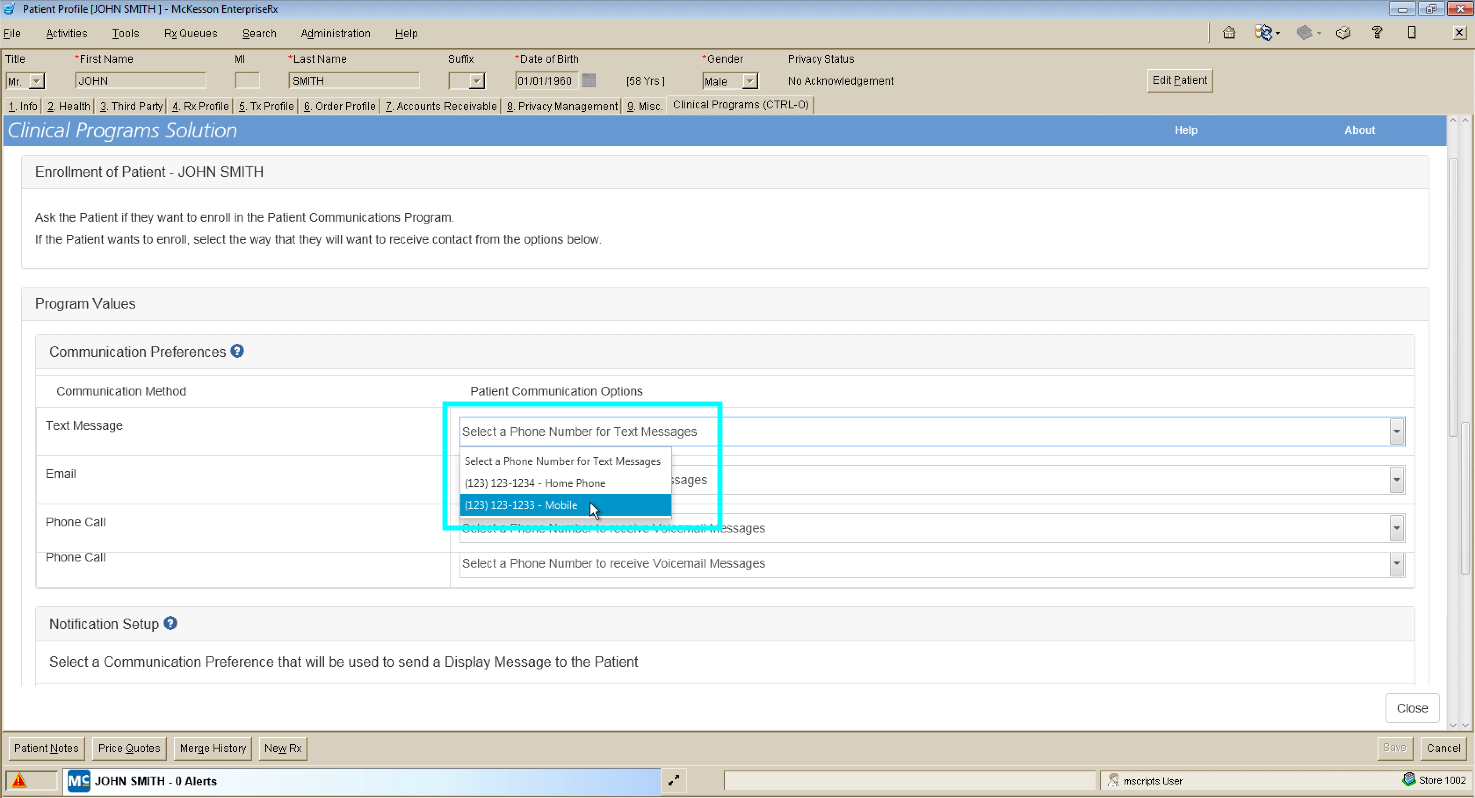
Once cell number is selected in the Text Message drop down, click on the Enroll button. This will trigger mscripts sending the Welcome message to patient.
IMPROTANT: Please don't make any changes in the Notification Setup section. mscripts will automatically configure the settings as needed once text messaging is activated.

Video tutorial
Printable McKesson enrollment directions
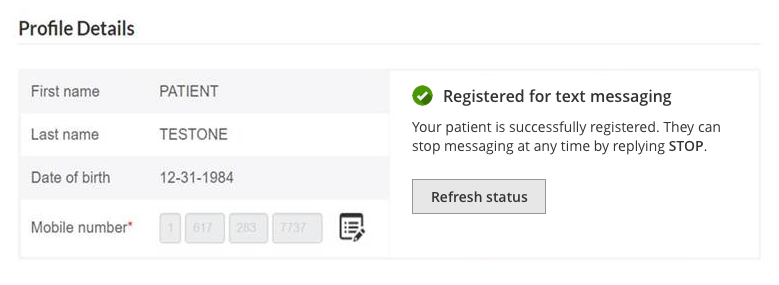
Step 1
ASK: Would you like to receive a text when your prescription is ready?
Step 2
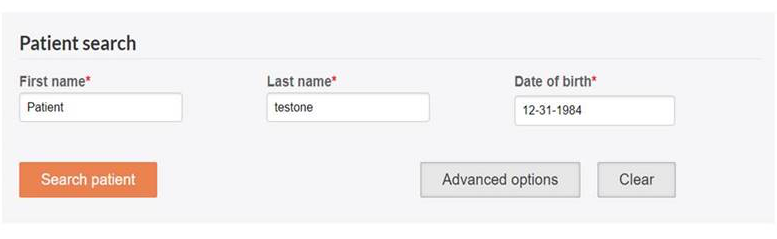
Go to the McKesson patient portal to access the mscripts patient registration page. Enter the patient's First Name, Last Name and Date of Birth and press Enter or click Search Patient.
Step 3
Enter the patient's Mobile Phone Number. Then press enter or click on the Register button on the right.
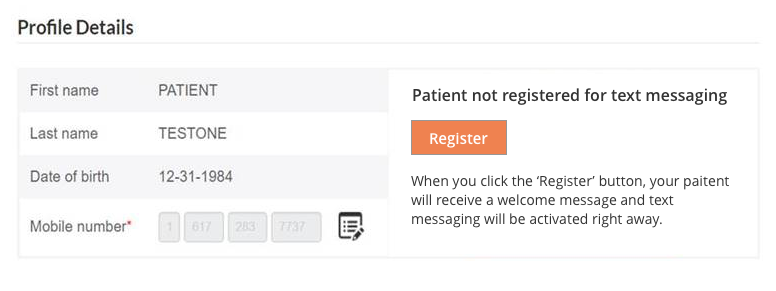
Step 4
You're done! Your patient will receive a Welcome Message and text messaging will be activated right away. They can stop messaging any time by replying Stop.